Tutorial: How To Design a Realistic Takeout Coffee Icon

This tutorial assumes a basic understanding of the Adobe Photoshop software package, and was created using version CS5, however I think CS3+ can perform most if not all of the same tasks.
 Let's begin with the tutorial:
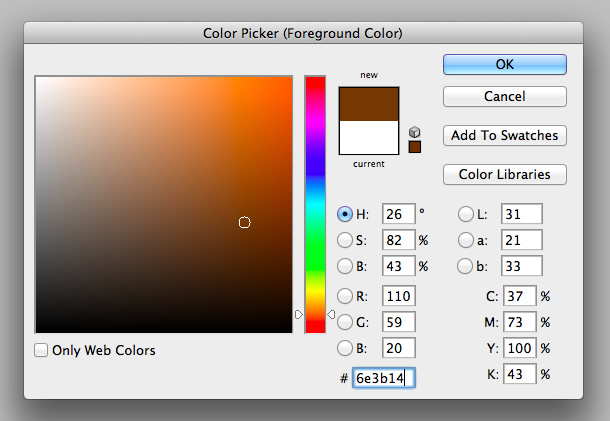
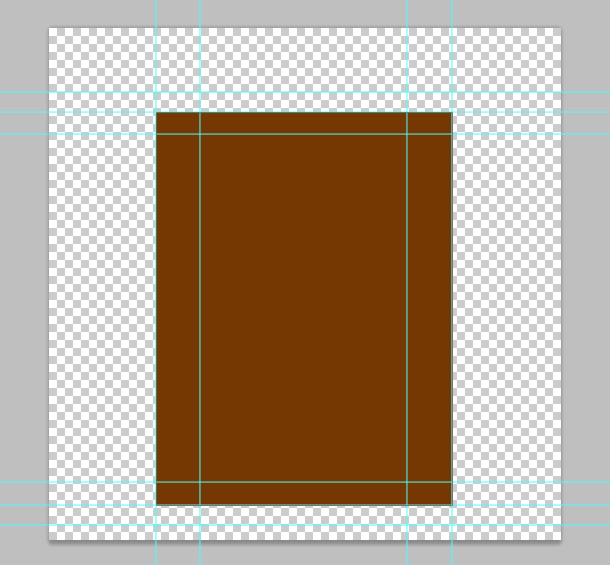
 Set the foreground colour to #6e3b14 and draw a rectangle (U) shape layer in the centre but towards the bottom of the document at about 295x395px. this will be the building block of our cup.
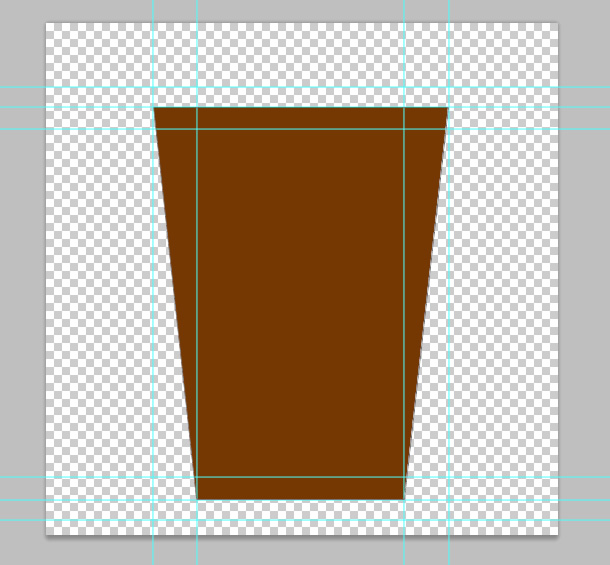
 Using the direct selection tool (A) grab the bottom corners of your rectangle shape layer and nudge (arrow keys) them to meet the inside guides you drew, this will make your rectangle appear to expand towards the top.
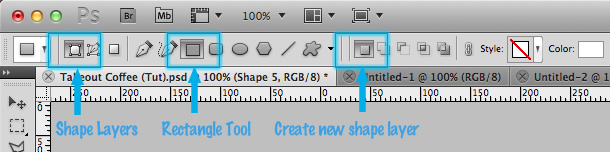
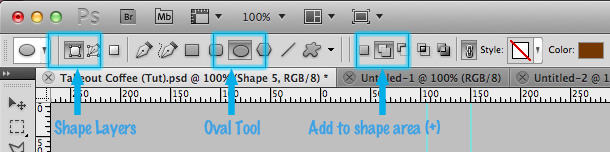
 We will now be using Photoshop's boolean tools, so make sure you have the shape layer still selected (thin grey lines will be visible) and using the toolbar at the top of the window select Shape Layer, Oval, Subtract from shape layer.
 Now draw an oval using these options within the top guides, the result will be an area subtracted from the original rectangle rather than a new shape layer.
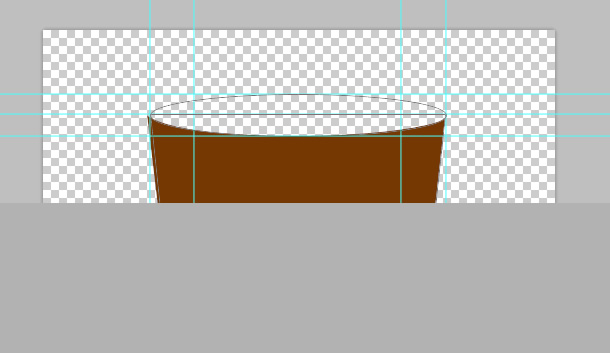 Repeat the last step at the bottom of the rectangle with one difference, select the Add to shape layer as opposed to subtract or create new.
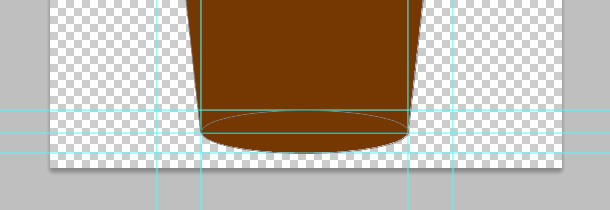 At this point we should have the basic shape that will form the coffee cup.
Note: if at point during this you feel like getting a coffee, for motivation feel free ;).
At this point we should have the basic shape that will form the coffee cup.
Note: if at point during this you feel like getting a coffee, for motivation feel free ;).
 The top row of stops in order are:
Opacity: 100 Location: 0, Opacity: 0 Location: 50, Opacity: 100 Location: 100
The bottom row of stops are:
Color: #190e03, Location: 0, Color: #ffffff, Location: 50, Color: #190e03, Location: 100
Having a white stop in the centre of the two dark brown stops creates a simultaneous shadow and highlight using just one gradient.
Create a new layer (CMD/CTRL+SHIFT+N)<
The top row of stops in order are:
Opacity: 100 Location: 0, Opacity: 0 Location: 50, Opacity: 100 Location: 100
The bottom row of stops are:
Color: #190e03, Location: 0, Color: #ffffff, Location: 50, Color: #190e03, Location: 100
Having a white stop in the centre of the two dark brown stops creates a simultaneous shadow and highlight using just one gradient.
Create a new layer (CMD/CTRL+SHIFT+N)<
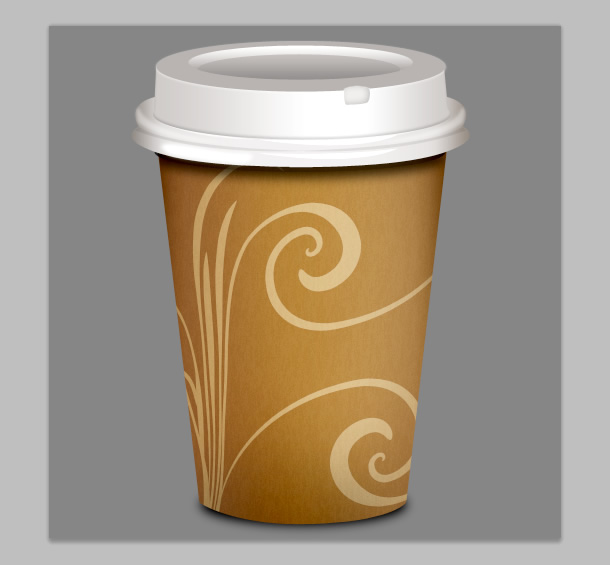
Preview the Final Icon
Here's a sneak preview of the final product of this tutorial, this is how the icon should turn out:
Let's begin with the tutorial:
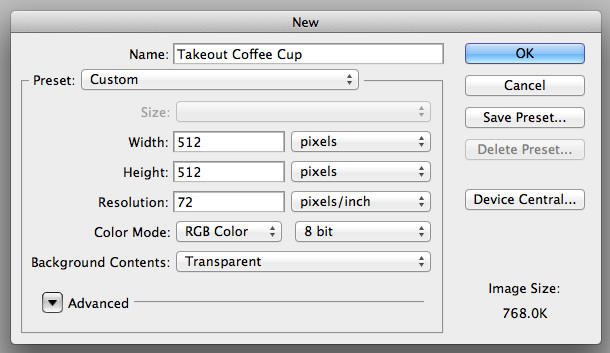
Setting up the Document
Start by creating the document, this is going to be a pretty high res icon so set the width and height to 512px, even if you use the final image slightly smaller it's best to start off bigger for a crisper result, unless you plan to reduce the size by over 50% this is usually a good rule to stick to. Also set the background to transparent but feel free to use a mid grey solid colour temporarily through the project if you feel the checkerboard effect is interfering with the design.
Set the foreground colour to #6e3b14 and draw a rectangle (U) shape layer in the centre but towards the bottom of the document at about 295x395px. this will be the building block of our cup.
Drawing the Cup
Now let's draw some guides to help us keep the cup in proportion. Start by simply dragging new guides in to touch the edges of the shape you just drew, from here create 2 new guides around 20px above and below the top line, and repeat for the bottom line. Finally draw a new guide about 45px in from each of the vertical guides. your result should be something like this.
Using the direct selection tool (A) grab the bottom corners of your rectangle shape layer and nudge (arrow keys) them to meet the inside guides you drew, this will make your rectangle appear to expand towards the top.
We will now be using Photoshop's boolean tools, so make sure you have the shape layer still selected (thin grey lines will be visible) and using the toolbar at the top of the window select Shape Layer, Oval, Subtract from shape layer.
Now draw an oval using these options within the top guides, the result will be an area subtracted from the original rectangle rather than a new shape layer.
Repeat the last step at the bottom of the rectangle with one difference, select the Add to shape layer as opposed to subtract or create new.
At this point we should have the basic shape that will form the coffee cup.
Note: if at point during this you feel like getting a coffee, for motivation feel free ;).
Adding Texture to the Cup
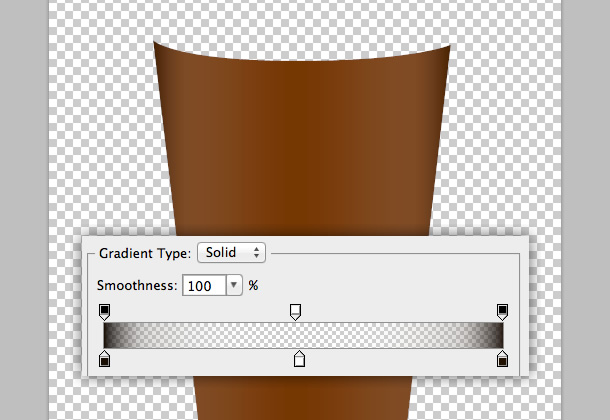
Back to the design, at the moment it's the right shape but looks nothing like a dimensional cup, this can be solved with a simple gradient a bit of shading. First the gradient, double click the rectangle's layer in the layer palette (Window > Layers) or right click and select Blending Options.... Select Gradient Overlay and create a gradient like the one demonstrated below.
The top row of stops in order are:
Opacity: 100 Location: 0, Opacity: 0 Location: 50, Opacity: 100 Location: 100
The bottom row of stops are:
Color: #190e03, Location: 0, Color: #ffffff, Location: 50, Color: #190e03, Location: 100
Having a white stop in the centre of the two dark brown stops creates a simultaneous shadow and highlight using just one gradient.
Create a new layer (CMD/CTRL+SHIFT+N)<Want More?
Get curated design picks delivered straight to your inbox