How to Use the Active Store UI Kit to Create a Layout

How to Create a Homepage Layout
Please note that Active Store UI Kit is a premium resource that can be downloaded by members or via a single purchase.Step 1
Launch Photoshop and create a new document (Width: 1400 Pixels, Height 2680 Pixels).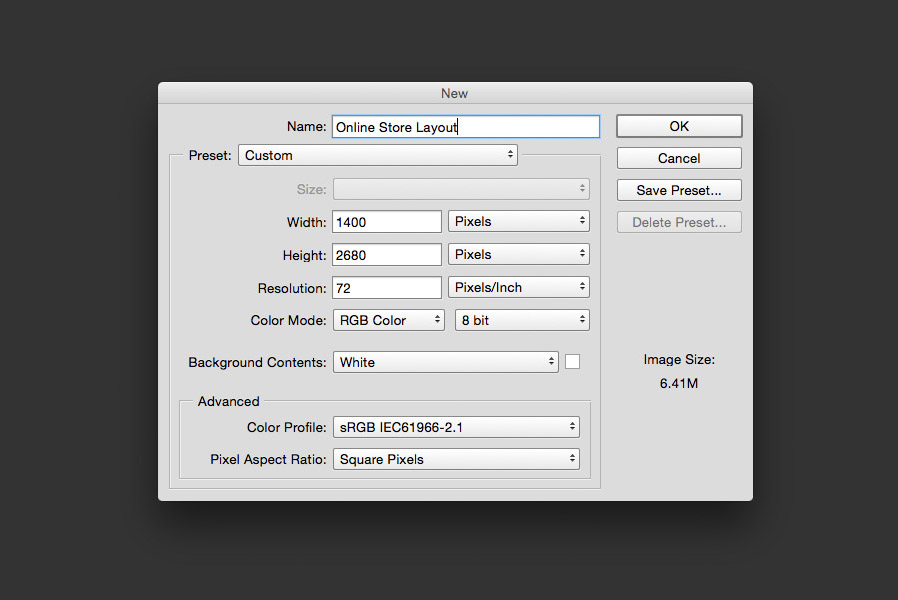
Step 2
The Active Store UI Kit uses a 12 column grid, 1200 pixels in total with 80 pixel columns and 20 pixel gutters. If your version of Photoshop has it, you can use the View > New Guide Layout.. function to create a matching grid. Alternatively, you can duplicate one of the Active Store UI Kit documents, open it in Photoshop and delete all of the contents which will leave you with just the grid and a blank document.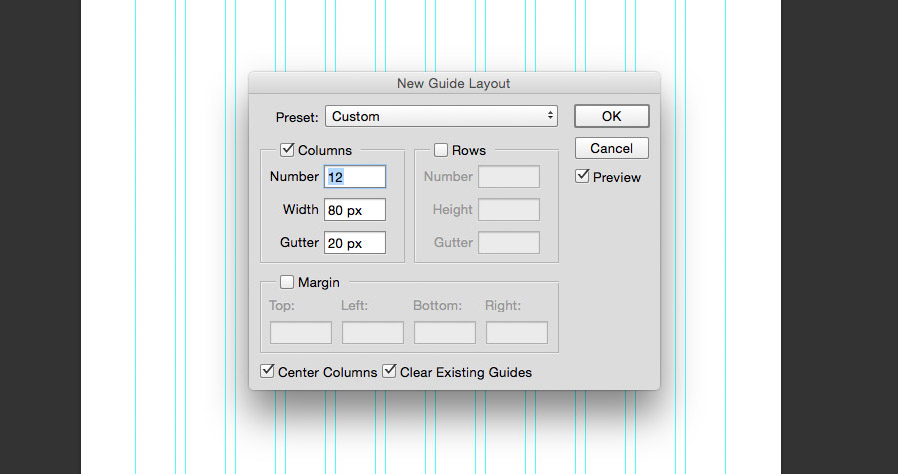
Step 3
Create a new Fill Layer (Layer > New Fill Layer > Solid Color) and set the fill color to #f6f6f6 for a very subtle light grey background.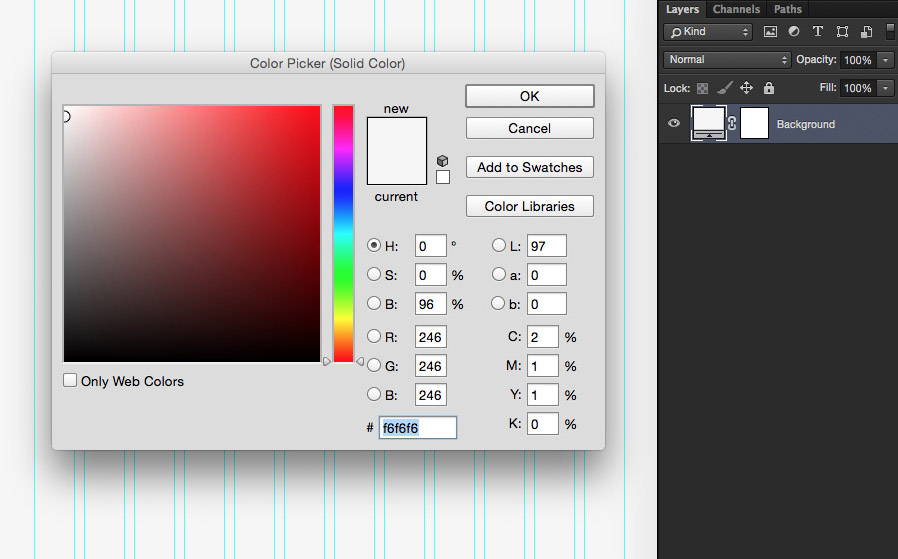
Step 4
Open 1 - Navigation & Promo Blocks.psd from the Active Store UI Kit and copy the 'Navigation' group into your blank document. Here's how to do that: How to Duplicate Groups and Layers Between Documents in Photoshop.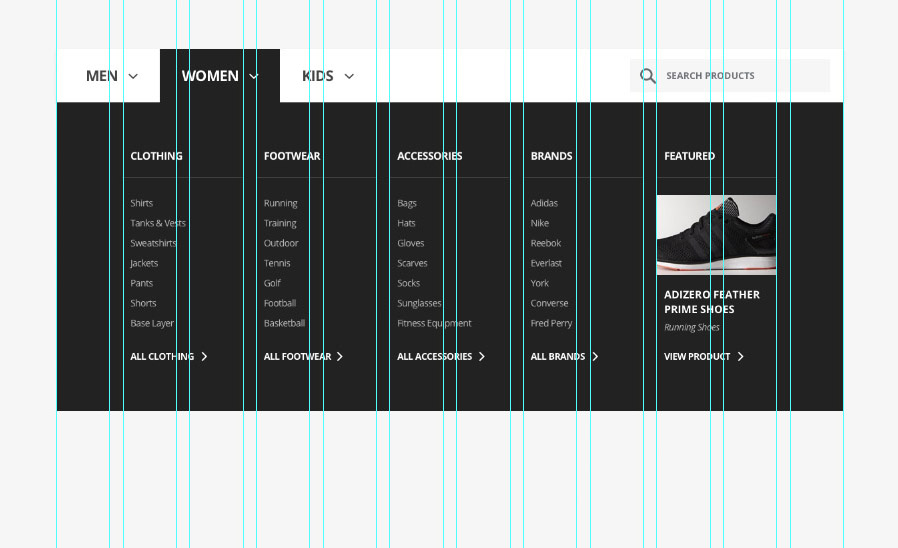
Step 5
The 'Navigation' group includes a hover dropdown state which we can hide for now. To do this set the fill color for the 'Women' text layer and associated 'Arrow' shape layer to #444444. Then turn off visibility for the 'Dropdown' group layer and 'Active State' shape layers.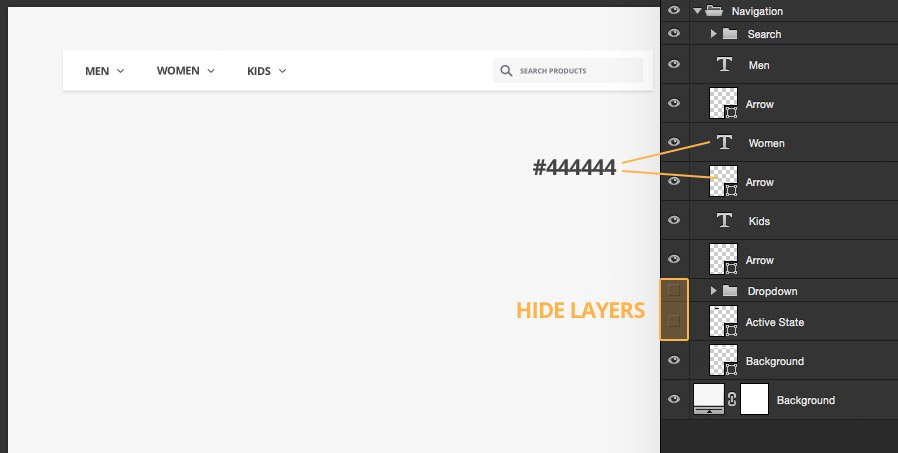
Step 6
Let's also make the navigation menu full width. Move the whole 'Navigation' group to the top of the canvas, and then use the Direct Selection Tool to select the top and bottom vector points on either side of the 'Background' shape layer and drag them to the edges of the document. The image below will help explain this.
Step 7
Open the 1 - Navigation & Promo Blocks.psd file again and this time copy over the 'Banner' group. Place it below the 'Navigation' group in the Layers panel.
Step 8
Let's also make the banner full width, use the Direct Selection Tool to select the top and bottom vector points on either side of the 'Background' shape layer and drag them to the edges of the document.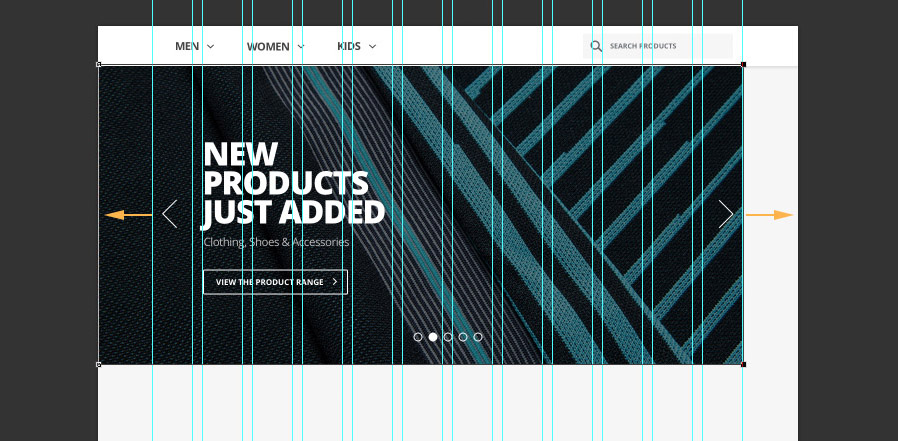
Step 9
We now have a bit more space for the arrows on the banner, so we can Nudge them 70 pixels out towards the edges of the document.
Step 10
Open 2 - Catalog.psd from the Active Store UI Kit and copy the first 'Featured Products' group into your document. Place it in the center of the document, just below the banner.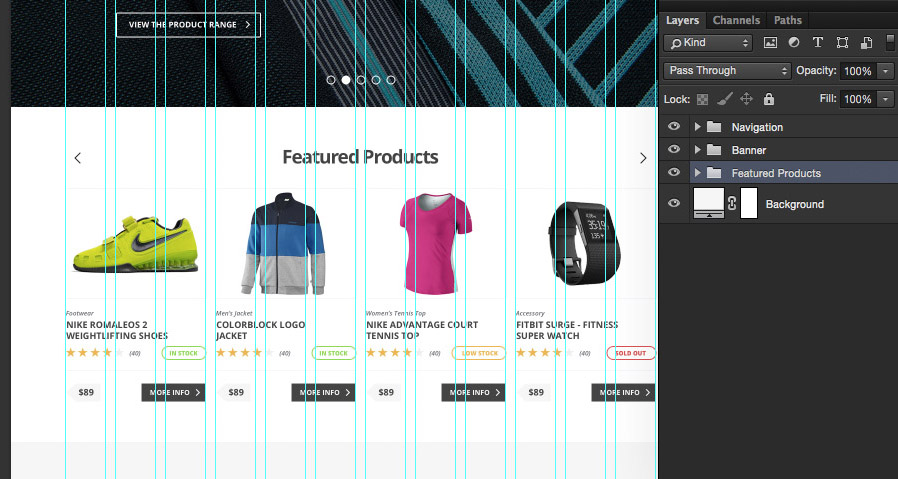
Step 11
Duplicate the 'Featured Products' group and place the duplicated copy directly below the first instance.
Step 12
Update the title to say 'New Additions' instead and hide the shape layer 'Rectangle 1' to remove the white background and create a distinction between this section and the Featured Products section.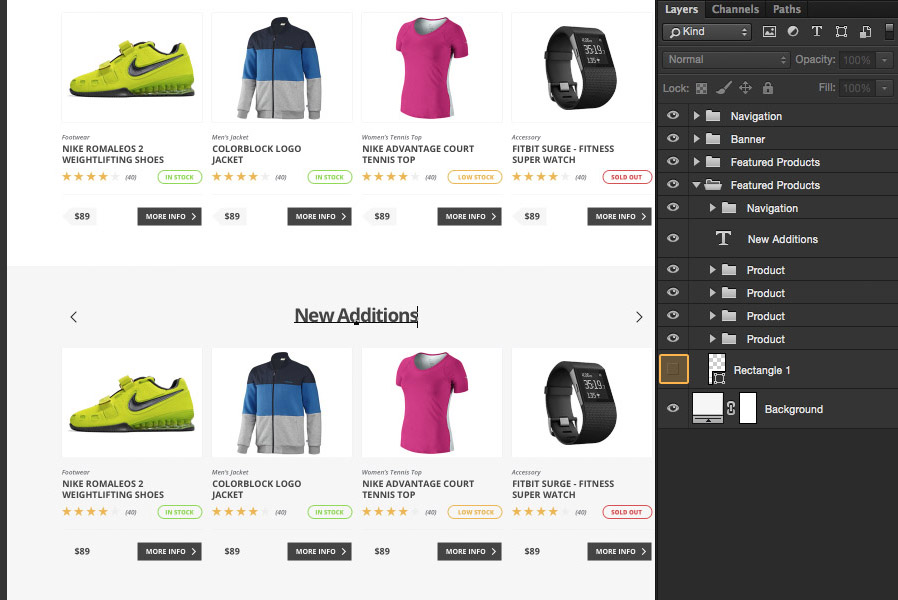 <
<Want More?
Get curated design picks delivered straight to your inbox